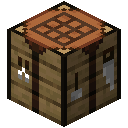
What is Raiser Armor Trim Smithing Template in Minecraft?
The raiser armor trim is a special smithing template that lets you add a cool pattern to your armor. It is a purely cosmetic item, which means it does not make your armor any stronger, but it does make it look unique and stylish. The design features bold lines that rise up along your gear, giving it a very distinguished and sharp look. You can use it to customize your helmet, chestplate, leggings, and boots. Finding a raiser armor trim is a fun reward for exploring the new trail ruins, giving you a new way to show off your adventurous style. It is part of a whole collection of armor trims that let you personalize your gear and stand out. It is a great way to make your armor feel truly yours and show everyone you are a dedicated archaeologist who has uncovered ancient secrets.
How to get Raiser Armor Trim Smithing Template in Minecraft
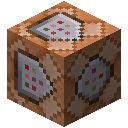
You can only find the raiser armor trim smithing template by doing some archaeology in trail ruins. These are large, partially buried structures found in taiga, snowy taiga, old growth taiga, and jungle biomes. To find the trim, you will first need to craft a brush. The recipe for a brush is one feather, one copper ingot, and one stick arranged vertically in a crafting table. With your brush in hand, travel to one of the biomes with trail ruins and start digging. As you explore the ruins, you will find blocks of suspicious gravel mixed in with regular gravel. When you use your brush on these suspicious blocks, you will slowly uncover a hidden item. The raiser armor trim has a decent chance, just over eight percent, of being the item you find. It might take a bit of searching, but it is a fun treasure hunt. Once you find your first one, you do not have to find another. You can make a copy of it by going to a crafting table and combining the trim with seven diamonds and one block of terracotta. This will give you two raiser armor trims, so you can decorate your whole set of armor.
How to use Raiser Armor Trim Smithing Template in Minecraft
To use the raiser armor trim, you will need a smithing table. Place the raiser armor trim in the first slot of the smithing table. In the second slot, place the piece of armor you want to decorate, like a diamond helmet or a netherite chestplate. In the third slot, you place a mineral that will decide the color of the pattern. For example, using gold will make the trim yellow, using an emerald will make it green, and using amethyst will make it purple. There are ten different colors to choose from. Once all three items are in place, your new decorated armor will appear in the result slot. The trim is used up in the process, so it is a very good idea to make a copy of it first before you use your only one. This way you can apply the pattern to all your armor pieces.
How to craft Raiser Armor Trim Smithing Template in Minecraft Shaped